Configure Neovim - Adding And Remembering Keymaps
Published on Oct 19, 2025
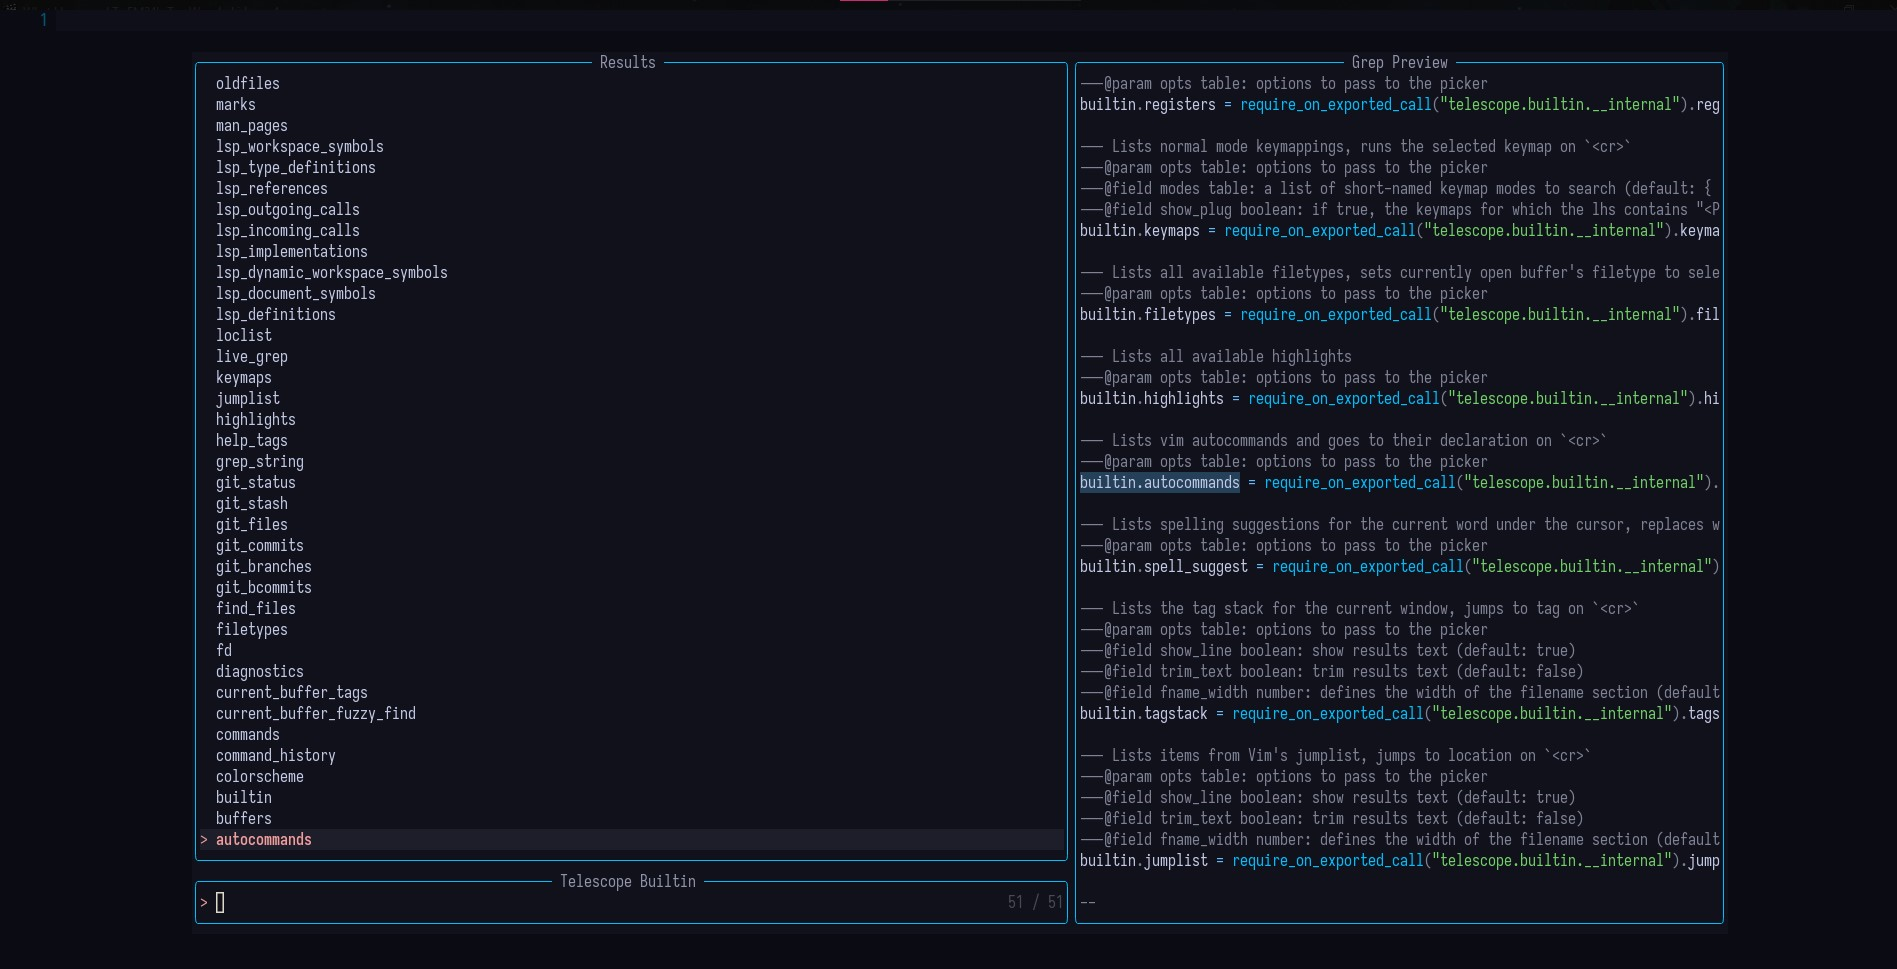
Adding Which-Key.nvim - Never Forget Your Keymaps Again
As we continue building our Neovim configuration, we’ve added several plugins with numerous keymaps. Remembering all these keyboard shortcuts can be challenging, especially when you’re just starting out. This is where Which-Key.nvim comes to the rescue - it displays a popup with possible key bindings as you type, making it easy to discover and remember your configured shortcuts.
What is Which-Key.nvim?
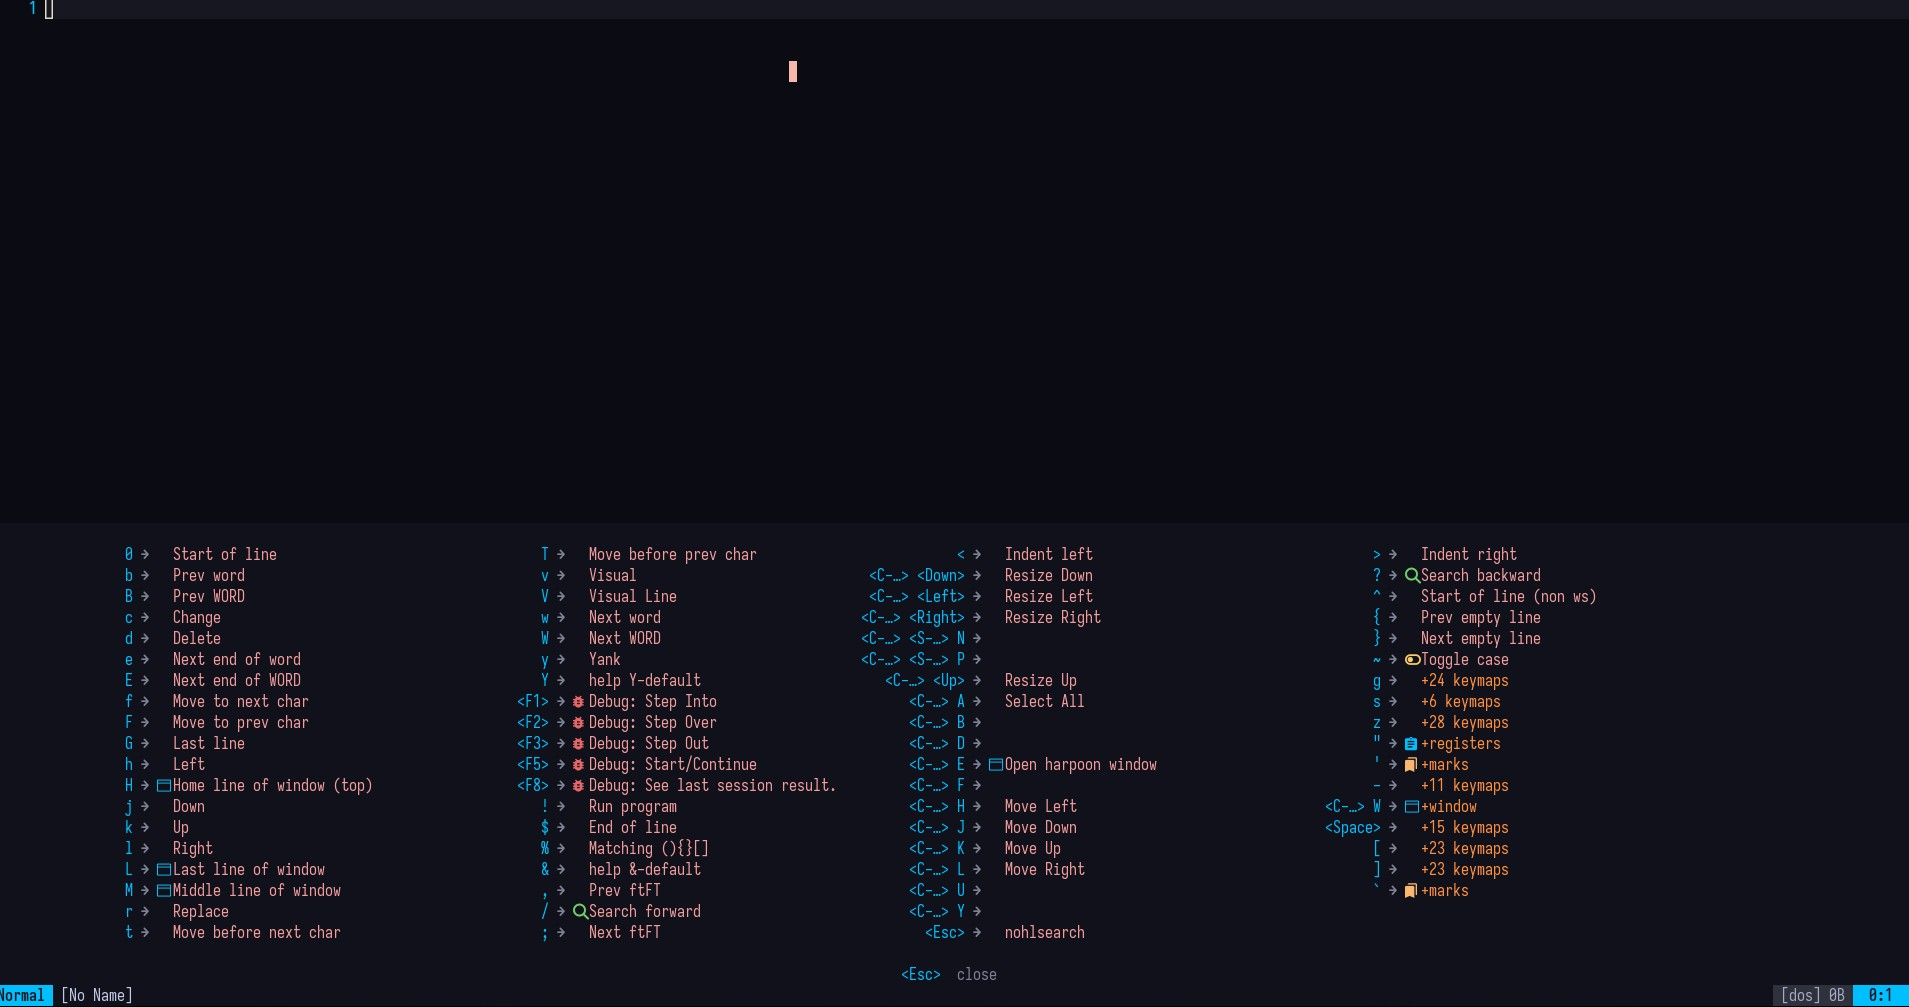
Which-Key.nvim is another excellent plugin created by Folke that displays a popup showing all available keybindings when you start typing a key sequence. Think of it as your personal cheat sheet that appears exactly when you need it. If you’ve configured <leader>f for file operations, Which-Key will show you all the <leader>f combinations available when you press the space bar and f.
Why Use Which-Key?
Here are some compelling reasons to add Which-Key to your configuration:
- Discover keymaps - See all available options without memorizing everything
- Learn faster - New users can explore features through the popup interface
- Self-documenting - Your keymaps become their own documentation
- Organize shortcuts - Group related commands under common prefixes
- Reduce mistakes - Avoid pressing wrong key combinations
Installing Which-Key.nvim
1. Create the Plugin File
Following our established file structure, create a new file called whichkey.lua in your plugins folder:
lua/
    config/
    plugins/
        colorscheme.lua
        noice.lua
        lualine.lua
        telescope.lua
        whichkey.lua
2. Add the Plugin Configuration
Open the whichkey.lua file and add the following code:
return {
  "folke/which-key.nvim",
  event = "VeryLazy",
  init = function()
    vim.o.timeout = true
    vim.o.timeoutlen = 300
  end,
  config = function()
    local wk = require("which-key")

    wk.setup({
      plugins = {
        marks = true,
        registers = true,
        spelling = {
          enabled = true,
          suggestions = 20,
        },
        presets = {
          operators = true,
          motions = true,
          text_objects = true,
          windows = true,
          nav = true,
          z = true,
          g = true,
        },
      },
      window = {
        border = "rounded",
        position = "bottom",
        margin = { 1, 0, 1, 0 },
        padding = { 1, 2, 1, 2 },
        winblend = 0,
      },
      layout = {
        height = { min = 4, max = 25 },
        width = { min = 20, max = 50 },
        spacing = 3,
        align = "left",
      },
    })
  end,
}
Let me break down this configuration:
Event Loading:
event = "VeryLazy"- Loads the plugin after Neovim starts, improving startup time
Init Function:
timeout = true- Enables timeout for key sequencestimeoutlen = 300- Wait 300ms before showing the Which-Key popup
Plugins Section:
marks- Show marks (bookmarks in files)registers- Show register contentsspelling- Show spelling suggestionspresets- Enable built-in keybinding help for operators, motions, etc.
Window Configuration:
border = "rounded"- Rounded borders for the popupposition = "bottom"- Display at the bottom of the screenpaddingandmargin- Spacing around the popup
3. Register Your Keymaps
Which-Key works best when you explicitly register your keymaps with descriptions. Update your config/keymaps.lua file or create keymap registrations in the Which-Key config:
return {
  "folke/which-key.nvim",
  event = "VeryLazy",
  init = function()
    vim.o.timeout = true
    vim.o.timeoutlen = 300
  end,
  config = function()
    local wk = require("which-key")

    wk.setup({
      -- previous setup options here
    })

    -- Register keymap groups
    wk.register({
      ["<leader>f"] = { name = "Find" },
      ["<leader>b"] = { name = "Buffer" },
      ["<leader>g"] = { name = "Git" },
      ["<leader>l"] = { name = "LSP" },
      ["<leader>s"] = { name = "Search" },
      ["<leader>t"] = { name = "Toggle" },
      ["<leader>w"] = { name = "Window" },
    })

    -- Register specific keymaps with descriptions
    wk.register({
      ["<leader>ff"] = { "<cmd>Telescope find_files<cr>", "Find Files" },
      ["<leader>fg"] = { "<cmd>Telescope live_grep<cr>", "Live Grep" },
      ["<leader>fb"] = { "<cmd>Telescope buffers<cr>", "Find Buffers" },
      ["<leader>fh"] = { "<cmd>Telescope help_tags<cr>", "Find Help" },
      ["<leader>fr"] = { "<cmd>Telescope oldfiles<cr>", "Recent Files" },
    })

    -- Window management
    wk.register({
      ["<leader>wv"] = { "<cmd>vsplit<cr>", "Vertical Split" },
      ["<leader>wh"] = { "<cmd>split<cr>", "Horizontal Split" },
      ["<leader>wq"] = { "<cmd>close<cr>", "Close Window" },
      ["<leader>wo"] = { "<cmd>only<cr>", "Close Other Windows" },
    })

    -- Buffer management
    wk.register({
      ["<leader>bd"] = { "<cmd>bdelete<cr>", "Delete Buffer" },
      ["<leader>bn"] = { "<cmd>bnext<cr>", "Next Buffer" },
      ["<leader>bp"] = { "<cmd>bprevious<cr>", "Previous Buffer" },
    })
  end,
}
4. Alternative: Separate Keymap Configuration
For better organization, you can create a dedicated keymaps configuration file that works with Which-Key. Create config/keymaps.lua:
local wk = require("which-key")

-- Leader key groups
wk.register({
  f = {
    name = "Find",
    f = { "<cmd>Telescope find_files<cr>", "Find Files" },
    g = { "<cmd>Telescope live_grep<cr>", "Live Grep" },
    b = { "<cmd>Telescope buffers<cr>", "Buffers" },
    h = { "<cmd>Telescope help_tags<cr>", "Help Tags" },
    r = { "<cmd>Telescope oldfiles<cr>", "Recent Files" },
    s = { "<cmd>Telescope grep_string<cr>", "Find String" },
  },

  b = {
    name = "Buffer",
    d = { "<cmd>bdelete<cr>", "Delete Buffer" },
    n = { "<cmd>bnext<cr>", "Next Buffer" },
    p = { "<cmd>bprevious<cr>", "Previous Buffer" },
    f = { "<cmd>bfirst<cr>", "First Buffer" },
    l = { "<cmd>blast<cr>", "Last Buffer" },
  },

  w = {
    name = "Window",
    v = { "<cmd>vsplit<cr>", "Vertical Split" },
    h = { "<cmd>split<cr>", "Horizontal Split" },
    q = { "<cmd>close<cr>", "Close Window" },
    o = { "<cmd>only<cr>", "Close Others" },
  },

  l = {
    name = "LSP",
    d = { vim.lsp.buf.definition, "Go to Definition" },
    r = { vim.lsp.buf.references, "Find References" },
    R = { vim.lsp.buf.rename, "Rename Symbol" },
    h = { vim.lsp.buf.hover, "Hover Documentation" },
    a = { vim.lsp.buf.code_action, "Code Actions" },
  },

  t = {
    name = "Toggle",
    n = { "<cmd>set number!<cr>", "Toggle Line Numbers" },
    r = { "<cmd>set relativenumber!<cr>", "Toggle Relative Numbers" },
    w = { "<cmd>set wrap!<cr>", "Toggle Line Wrap" },
  },
}, { prefix = "<leader>" })

-- Non-leader keymaps
wk.register({
  ["<C-h>"] = { "<C-w>h", "Move to Left Window" },
  ["<C-j>"] = { "<C-w>j", "Move to Bottom Window" },
  ["<C-k>"] = { "<C-w>k", "Move to Top Window" },
  ["<C-l>"] = { "<C-w>l", "Move to Right Window" },
})
Then require this file in your init.lua:
require("config.keymaps")
Using Which-Key
After saving your files and restarting Neovim, Which-Key will automatically be installed and configured. Here’s how it works in practice:
Basic Usage
- Press your leader key (Space bar in our config)
- Wait 300ms - The Which-Key popup appears showing all available options
- Press the next key - Either complete the command or see more options
- Navigate with arrow keys - If there are many options
Example Workflow
Let’s say you want to find files:
- Press
<Space>- Which-Key popup appears showing all leader key groups - See
f → Findin the list - Press
f- Which-Key shows all file-finding options - Press
fagain - Opens Telescope’s find_files
Advanced Configuration
Custom Icons and Colors
You can customize the appearance of Which-Key further:
wk.setup({
  icons = {
    breadcrumb = "»",
    separator = "➜",
    group = "+",
  },
  popup_mappings = {
    scroll_down = "<c-d>",
    scroll_up = "<c-u>",
  },
})
Adding Descriptions for Visual Mode
You can also register keymaps for visual mode:
wk.register({
  ["<leader>"] = {
    c = { name = "Comment" },
    g = { name = "Git" },
  },
}, { mode = "v" })
Show Keymap Documentation
To see all registered keymaps, use the command:
:WhichKey
Or for a specific prefix:
:WhichKey <leader>
Tips
-
Group Related Commands - Use common prefixes for related operations (e.g., all file operations under
<leader>f) -
Descriptive Names - Use clear, concise descriptions for your keymaps
-
Consistent Patterns - Follow mnemonic patterns (f for find, b for buffer, w for window)
-
Don’t Over-Register - Only register custom keymaps; Which-Key handles built-in Vim commands automatically
-
Adjust Timeout - If 300ms feels too fast or slow, adjust
timeoutlento your preference -
Use Icons Sparingly - Too many icons can make the popup cluttered
Common Keymap Organization
Here’s a recommended keymap organization structure:
<leader>f- Find/File operations (Telescope, file explorer)<leader>b- Buffer operations<leader>w- Window operations (splits, navigation)<leader>g- Git operations<leader>l- LSP operations (when you add LSP support)<leader>t- Toggle settings<leader>s- Search operations<leader>h- Help and documentation<leader>d- Debug operations (when you add debugging)
Conclusion
Which-Key.nvim transforms your Neovim experience from memorizing countless keybindings to discovering them naturally as you work. It’s especially valuable when you’re building your configuration and adding new plugins - you’ll always have a reference for what shortcuts are available.
The self-documenting nature of Which-Key encourages you to organize your keymaps logically, making your entire configuration more maintainable and user-friendly.
In the next post, we’ll explore adding a file explorer like nvim-tree to navigate your project structure visually. You can find my previous Neovim configuration posts here.